
Say goodbye to inner tubes and hello to tubeless
Are you tired of standing by the side of the road with a flat inner tube? Then it might be time to switch to tubeless tires. Tubeless is not just a trend – it is a game-changer for those who want a more seamless and comfortable ride. We see more and more people switching from inner tubes to tubeless - so it can’t be that bad to ride with, right? No - it certainly isn't. The setup is relatively easy and the ride quality with tubeless is top-notch.
What actually is tubeless?
Think of a tubeless tire as a large, airtight balloon inside your wheel. Instead of a traditional inner tube and valve, you use a special tubeless valve and a sealant liquid. When you inflate the tire, the liquid spreads out and seals any small holes, allowing you to continue your ride without interruptions. In other words, you are free from inner tubes and instead ride with sealant in the tire.

Why choose tubeless?
- Fewer punctures: Tubeless tires are far less prone to punctures than traditional tires with inner tubes. The sealant liquid patches small holes on its own, so you can keep cycling. Often, you won't even realize you had a hole until you get home
- Lower tire pressure: With tubeless, you can run lower tire pressure. This provides better grip, increased comfort, and reduces the risk of punctures from sharp objects
- Longer lifespan: Since you avoid the constant friction between inner tube and tire, your tires can last longer
-
More environmentally friendly: By avoiding the need to change inner tubes often, you reduce your waste

How to convert to tubeless:
- Prepare the wheel: Remove the old inner tube and valve, and ensure the rim is clean and dry
- Install the tubeless valve: Screw the new tubeless valve into the rim hole and tighten it well
- Add sealant: Pour the recommended amount of sealant into the tire through the valve. The required amount varies depending on the setup, but as a rule of thumb, you should use approx. 60ml in a road tire and approx. 80ml in a gravel tire
- Mount the tire: Fit the tire onto the rim and get it into position
- Inflate the tire: Inflate the tire to the max. tire pressure. Most of the time, the tire will make one or more loud "pops" - this is completely normal and indicates that the tire is seating properly, which is a prerequisite for tubeless
- Check for leaks: Spin the wheel - distribute the liquid thoroughly and check that the tire isn't losing air. Sometimes it may be necessary to go for a short ride on the wheels and let them sit overnight
Tips and tricks:
- Choose the right tubeless sealant: There are many different types of tubeless sealant on the market. Choose one that suits your bike and riding conditions. We recommend, for example, Peaty's and Silca, which are known for their ability to seal relatively large holes effectively and quickly, and not least for having good longevity in the tire
- Inflate the tire regularly: Even tubeless tires can lose air over time, so check the tire pressure regularly; the recommendation is before every ride
- Learn to repair tubeless tires: Although tubeless tires are more puncture-resistant, it can still happen. Learn to patch small holes yourself using a tubeless repair kit
- Consider a tubeless kit: A tubeless kit can be practical to bring on rides so you can repair punctures on the go.

Thinking about switching to tubeless? Here is what you need:
- Tubeless tires: The special tire that keeps the air inside. An example is the Pirelli P Zero Race RS TLR
- Tubeless sealant: Magic liquid that patches small holes on its own. An example is Peaty's tubeless sealant
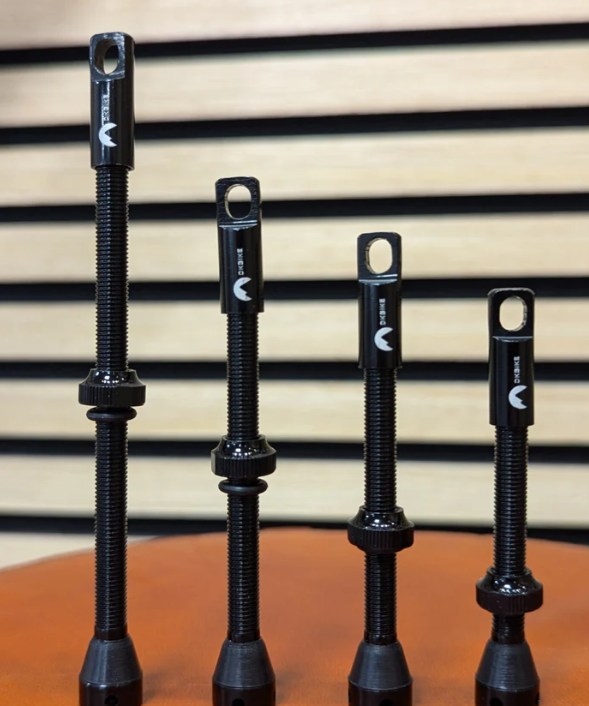
- Tubeless valve: The perfect valve for your tubeless setup. An example is DKBIKE Tubeless valves
- Tubeless repair kit: For when an accident happens and the sealant cannot fix the hole, you can use a tubeless plug
Punctured your tubeless? Don't panic! With the right tools, you can easily patch the hole yourself. Follow our guide and you will be back on the road in no time
Step 1: Find the leak. The first step is to figure out where the air is escaping. Check the entire tire for visible holes or damage. If you can't see anything, try spraying the tire with a mixture of water and soap. The spot where it bubbles is where there is a hole
Step 2: Use a plug. Now we need to plug the hole. Take a tubeless plug and insert it into the tool. Push the plug firmly into the hole so it stays put. Remove the excess part of the plug with a knife or leave it on - it will quickly wear down when you ride. We have made a video showing how it's done - you can watch it here on our DKBIKE Youtube channel
Step 3: Top up with sealant. To ensure the hole is completely sealed, you should add a little more tubeless sealant when you get home. Unscrew the valve core, pour the sealant in, and screw the valve core back in. Shake the tire around so the sealant distributes evenly
Step 4: Inflate. Inflate the tire to the recommended tire pressure. Use a pump with a pressure gauge so you can see how much air is in the tire
Step 5: Check again. Finally, just check if the tire is holding air. Spray it again with soapy water. If there are no bubbles, you are ready to ride again. Take a short ride to be absolutely sure

Tubeless tips:
- Check the tubeless sealant every 2-6 months
- Top up with sealant if necessary
- Always have a repair kit ready
- Enjoy your ride
Still in doubt?
If you are unsure whether tubeless is the right choice for you, or if you need help converting your tires, please feel free to contact us. We are ready to provide you with personal advice and help you find the right products.
Make your cycling trip more comfortable and seamless – switch to tubeless today!
Want to see a video that shows how to convert to tubeless? Then we have made this Youtube video



Leave a comment
This site is protected by hCaptcha and the hCaptcha Privacy Policy and Terms of Service apply.